

How to make a brand-new hard drive available? You need to partition it. Create new partitions for it and store various data on it. How would you like a free partition magic for Windows 10 that also doubles up as your disk management, partition recovery and cloning needs? If you answered yes to the above, then come let’s meet AOMEI Partition Assistant Standard 6.0. It is a partition manager that you should be getting your hands on, whenever you add a new hard disk drive or a solid state drive. AOMEI Partition Assistant is a great tool which makes things easy. By using it you can easily Split, Resize, Extend, Format, Delete Partition, Partition Recovery and so on in a matter of time and it is the best partition tool which offers so many advanced features in free version. Its interface is so clean and very understandable without any difficulties. Let’s look at how to partition a hard drive with this freeware.
1. Create Partition
If your disk has an unallocated space, you can right-click it to make new partition. If there is not any unallocated space on your disk, with this software, you can still get the free space from the existing partition to create the new partition.
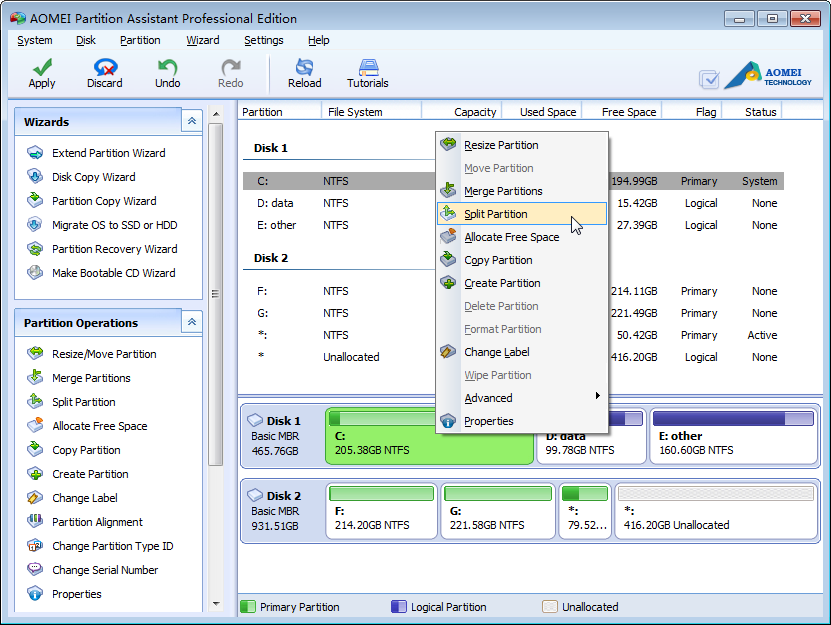
2. Split Partition
If you try AOMEI Partition Assistant, splitting the original partition into several small ones is just a piece of cake. Just open AOMEI Partition Assistant, right click the partition you want to free up space and select Split Partition option. Then specify the size and the lactation for the new partition and click ‘OK’. At last click the Apply option on the top left of dashboard, that’s it, it’s that simple in just a minute you can Split/Shrink partition.
3. Extend/Shrink Partition
AOMEI Partition Assistant offers you to quickly resize partition without any data losing. You can accurately extend or shrink the original partition size in few minutes. Open this software, right-click the partition you want to operate and then choose Resize Partition. Right moves the bar to increase volume from the unallocated space, or left drag the bar to shrink partition to get unallocated space and then click OK. At last, click Apply to perform all the operations.
4. Move Partition
AOMEI Partition Assistant helps you move any partition to your specified location easily which makes the unallocated space be ready for the upcoming extending partition. Moreover, you can adjust the position of the partition on a disk by using the “Move Partition” operation.
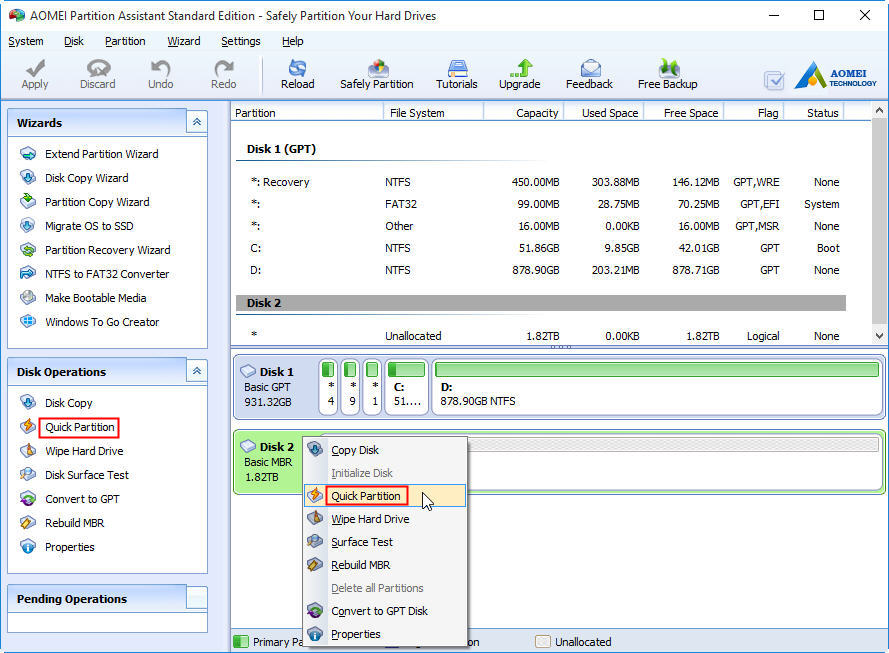
5. Quick Partition
“Quick Partition” in AOMEI Partition Assistant is especially designed to quickly repartition a hard drive, which runs smoothly in PC, Server and Windows PE systems. It applies to partition a new hard drive or repartition a hard drive that contains partitions already. Users can specify each partition size, type, volume label, etc. With only a few easy operations, a hard drive will be partitioned and formatted. If you don’t want to change the default partition count, type, label, open “Quick Partition” window and click “Start Partitioning”, and then the disk will be repartitioned and formatted quickly.

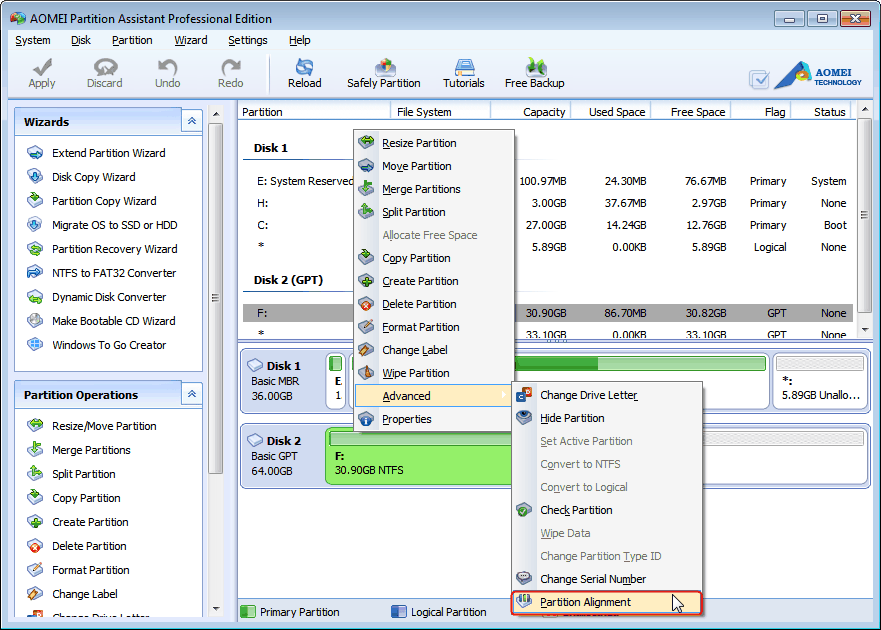
6. Align partition
Align Partition, as it is generally understood, is to indicate the proper alignment of partition. This function is special designed to accelerate the reading and writing speed for your hard disk, both Hard Disk Drive (HDD) and Solid State Drive (SSD). Thus, it greatly improves the operating speed of your disks and furthermore increases the efficiency of your computer. Therefore, it is of great importance to align partition.

Last Words
On the whole, AOMEI Partition Assistant Standard is one of the best free partition software. This Windows partition manager is more than capable to solve your entire partition and disk problems. Best of all, it is absolutely free and user-friendly. It has been upgraded to version 6.0, supporting Windows 10, Windows 8.1, Windows 8, Windows 7, Vista, XP and 2000 Pro SP4.